Welcome to the Bounty Hunter Metal Detector user manual! This guide helps you understand and operate your detector effectively. Designed for both beginners and experienced users‚ it covers assembly‚ settings‚ and tips for successful treasure hunting. Whether you’re searching for coins‚ jewelry‚ or historical artifacts‚ this manual ensures you get the most out of your Bounty Hunter Metal Detector.
Overview of the Bounty Hunter Metal Detector
The Bounty Hunter Metal Detector is a versatile and user-friendly device designed for treasure hunting and metal detection. It features Motion Detection technology‚ requiring coil movement to detect targets. Ideal for beginners and experienced users‚ it offers adjustable sensitivity and discrimination settings to optimize performance. The detector is lightweight and durable‚ making it suitable for various terrains. With its easy-to-use interface‚ you can start detecting right away. Whether searching for coins‚ jewelry‚ or historical artifacts‚ the Bounty Hunter Metal Detector provides reliable results. Always begin with low sensitivity to avoid false signals and adjust as needed. This detector is a great choice for those looking to explore the exciting world of metal detection.
Key Features and Components
The Bounty Hunter Metal Detector boasts several key features that enhance its performance. It includes a lightweight design for comfortable use over extended periods. The detector is equipped with a Motion Detection system‚ which requires the search coil to move over the target for detection. This feature helps reduce false signals and improves accuracy. The control panel includes sensitivity and discrimination adjustments‚ allowing users to fine-tune settings based on their environment. The search coil is interchangeable and durable‚ designed to handle various terrains. Additional components like the handle and armrest provide ergonomic support. These features make the Bounty Hunter Metal Detector a reliable and efficient tool for metal detection‚ suitable for both casual and serious treasure hunters.
Preparation for First Use
Before using your Bounty Hunter Metal Detector‚ ensure it is properly prepared. Begin by carefully unpacking the device and inspecting for any damage. Read the manual thoroughly to familiarize yourself with its components and operation. Check the battery compartment and install the required batteries. Ensure all parts‚ such as the search coil and control box‚ are securely attached. Adjust the handle to a comfortable height for easy maneuverability. Clear the search area of debris or obstacles to avoid interference. Start with low sensitivity settings to minimize false signals. Ground balancing‚ if necessary‚ should be performed in the area you plan to search. These steps will ensure your detector is ready for optimal performance and help you achieve accurate results during your treasure hunting adventures.

Assembly and Initial Setup
Start by assembling the Bounty Hunter Metal Detector according to the manufacturer’s instructions. Attach the control box to the handle and secure the search coil. Adjust the handle height for comfort and ensure all connections are tight. This step ensures proper functionality and prepares the detector for use.

Step-by-Step Assembly Instructions
Begin by carefully unboxing the Bounty Hunter Metal Detector and laying out all components. Attach the control box to the handle using the provided screws‚ ensuring it is securely fastened. Next‚ extend the handle to your desired height and tighten the locking mechanism. Now‚ attach the search coil to the lower stem‚ making sure it is properly aligned and secured. Connect the coil cable to the control box‚ ensuring a snug fit. Tighten all bolts and screws to prevent any loose parts during operation. Finally‚ double-check all connections and adjustments to ensure the detector is assembled correctly and ready for use. Proper assembly is crucial for optimal performance and accurate detection.
Attaching the Search Coil
To attach the search coil‚ align the connector on the coil cable with the control box port. Gently push the connector in until it clicks securely into place. Ensure the coil is properly aligned with the detector’s stem and tighten the retaining clamp or bolt to hold it firmly. Avoid over-tightening‚ as this may damage the stem or coil. Once attached‚ check the connection by gently tugging the coil to ensure it is secure. A loose connection can lead to poor performance or false signals. After attaching‚ proceed to adjust the detector’s settings as needed for optimal operation. Properly securing the search coil is essential for accurate detection and smooth operation during your treasure hunting adventures.
Tightening and Adjusting the Detector
Properly tightening and adjusting your Bounty Hunter Metal Detector ensures optimal performance and stability during use. Begin by tightening the stem bolts to secure the detector’s frame. Use an Allen wrench to tighten the bolts evenly‚ ensuring the stem remains straight and sturdy. Next‚ adjust the handle to a comfortable height by loosening the handle clamp and sliding it to the desired position. Tighten the clamp firmly to prevent movement. Check the search coil connection and ensure it is securely attached. If necessary‚ adjust the coil’s alignment to maintain balance. Avoid over-tightening‚ as this may damage the detector’s components. Regularly inspect and tighten all connections to prevent loosening during use. Proper adjustment ensures smooth operation and accurate detection‚ enhancing your treasure-hunting experience.
Operating the Metal Detector
Operating the Bounty Hunter Metal Detector involves turning it on‚ performing ground balancing‚ and using motion detection technology. Move the search coil smoothly over the ground to detect targets effectively.
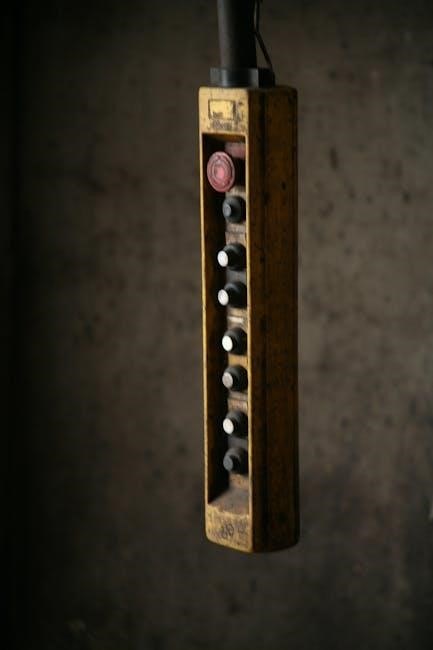
Understanding the Main Controls
The Bounty Hunter Metal Detector features an intuitive control panel designed for easy operation. The main controls include the power switch‚ sensitivity adjustment knob‚ and discrimination control. The power switch turns the detector on and off‚ while the sensitivity knob allows you to adjust the detector’s responsiveness to metal targets. The discrimination control helps differentiate between various types of metals‚ reducing false signals from unwanted items like nails or bottle caps. Additionally‚ the detector includes a ground balance feature to minimize interference from mineral-rich soil. Familiarizing yourself with these controls ensures optimal performance and a more enjoyable treasure-hunting experience.
Turning On and Ground Balancing

To begin using your Bounty Hunter Metal Detector‚ locate the power switch on the control panel and turn it on. Once powered up‚ the detector will emit a slight hum‚ indicating it is ready for operation. Before starting your search‚ it is essential to perform ground balancing to optimize performance. Ground balancing adjusts the detector to ignore mineral interference in the soil‚ ensuring accurate target detection. To ground balance‚ press and hold the balance button while sweeping the search coil slowly over the ground. Release the button when the tone stabilizes‚ and the detector is now calibrated to the soil conditions. This step ensures minimal false signals and enhances the detector’s ability to detect hidden treasures effectively. Regular ground balancing is recommended‚ especially when searching in different terrains or environments.
Motion Detection Technology
The Bounty Hunter Metal Detector features advanced Motion Detection Technology‚ designed to enhance target detection accuracy. This technology requires the search coil to be in continuous motion over the ground to activate the detector’s sensing capabilities. When the coil moves‚ it generates a magnetic field that interacts with metal objects‚ producing a signal. The detector processes this signal to identify the presence and type of target. Motion Detection Technology helps minimize false signals by distinguishing between stationary interference and moving targets. For optimal performance‚ maintain a steady‚ sweeping motion with the coil‚ avoiding abrupt stops or jerky movements. This feature makes the detector user-friendly while ensuring efficient scanning in various terrains. By leveraging motion-based detection‚ the Bounty Hunter Metal Detector delivers reliable results for both casual and serious treasure hunters. Regular use will help you master the technique and improve your metal detecting skills.

Adjusting Settings for Optimal Performance
Adjusting settings on your Bounty Hunter Metal Detector ensures optimal performance for various terrains and targets. Key adjustments include sensitivity and discrimination levels. Start with low sensitivity to reduce false signals‚ then increase as needed for deeper detection. Fine-tuning these settings helps distinguish between valuable targets and unwanted debris.
Understanding Sensitivity Settings
Sensitivity settings on the Bounty Hunter Metal Detector control how responsive the device is to metal objects. Higher sensitivity increases detection depth but may cause false signals in mineral-rich soil. Start with lower sensitivity to avoid interference and gradually increase for deeper searches. Adjusting sensitivity ensures better target identification and reduces noise from unwanted objects. Proper sensitivity calibration is crucial for optimal performance in various environments. Always test sensitivity levels in your search area to achieve the best results. This adjustment enhances the detector’s ability to distinguish between small and large targets‚ making your hunting experience more efficient and enjoyable. By mastering sensitivity settings‚ you can maximize the detector’s potential and uncover hidden treasures effectively.

Adjusting Discrimination Levels
Adjusting discrimination levels on your Bounty Hunter Metal Detector helps distinguish between different types of metals‚ enhancing your hunting experience. Lower levels detect a broad range of metals‚ including iron and steel‚ which can be found in trash. Higher levels focus on precious metals like gold and silver‚ reducing unwanted signals. Start with a lower level to gauge the signals‚ then increase it to filter out junk. Balance sensitivity with discrimination to avoid noise while detecting small or deep targets. Environmental factors like a trashy park may require higher discrimination‚ while cleaner areas might benefit from lower settings. Test discrimination by burying objects to see how settings affect detection. Keep a log of settings and results to refine your approach. Experimentation and understanding metal responses are key to effective use. With practice‚ you’ll minimize false signals and maximize your finds.