Welcome to the Grifco Roller Door Instruction Manual. This guide provides comprehensive instructions for installing, operating, and maintaining your roller door system. Ensure safety and optimal performance by following the detailed steps and precautions outlined in this manual. Discover key features, components, and troubleshooting tips to make the most of your Grifco roller door.
1.1 Overview of the Manual’s Content
This manual is designed to guide you through the installation, operation, and maintenance of your Grifco Roller Door. It contains detailed instructions, safety precautions, and troubleshooting tips to ensure optimal performance. The manual is divided into clear sections, covering key components, step-by-step installation processes, and maintenance routines. You will also find information on configuring the controller, programming remote controls, and understanding warranty terms. This comprehensive guide is intended for both professionals and homeowners, providing everything needed to safely and effectively manage your roller door system.
By following this manual, you can ensure your Grifco Roller Door operates efficiently and securely, meeting all safety and functional requirements.
1.2 Safety Precautions and Warnings
Before installing or operating your Grifco Roller Door, carefully read and follow all safety precautions to avoid accidents. Always disconnect power before performing maintenance or repairs. Keep loose clothing and long hair tied back to avoid entanglement. Never allow children to operate the door without adult supervision; Ensure the door is properly aligned and balanced to prevent unexpected movement. Avoid pinch points, such as between the door and frame, during operation. Never attempt to manually stop or block the door while it is moving. Use only approved Grifco accessories and follow the recommended load capacity. Regularly inspect springs, rollers, and hinges for wear. Failure to adhere to these guidelines may result in injury or damage. Always refer to the manual for specific safety instructions.
Components and Accessories of the Grifco Roller Door
The Grifco Roller Door system includes key components like the motor, track, rollers, and control panel. Accessories such as remote controls, mounting brackets, and safety sensors ensure smooth operation and reliability.
2.1 Key Parts of the Roller Door System
The Grifco Roller Door system comprises essential components designed for durability and efficiency. The motor, available in various models like eDrive 2.0, powers the door’s movement. A robust track system guides the door’s path, while high-quality rollers ensure smooth operation. The control panel acts as the brain, managing inputs from sensors and remote controls. Springs are calibrated for balance, reducing the effort needed to open or close the door. Safety sensors detect obstacles, preventing accidents, and a manual release mechanism allows operation during power outages. These parts work together seamlessly to provide reliable performance and user convenience.
2.2 Accessories Included in the Package
The Grifco Roller Door package includes essential accessories to ensure smooth installation and operation. These include a remote control with rolling code technology for secure operation, a manual release mechanism for emergencies, and a set of power cables for connecting the motor and controller. Additionally, the package contains mounting brackets and hardware for securing the operator and door components. Safety sensors are also provided to prevent accidents and ensure safe door operation. These accessories are designed to complement the roller door system, offering a comprehensive solution for both functionality and safety. Each item is carefully selected to enhance user experience and system performance.
Installation Steps for the Grifco Roller Door
Site preparation is essential for safe and proper installation. Follow the steps to mount components securely and connect power correctly. Ensure all safety measures are strictly followed.
3.1 Preparing the Site for Installation
Before installation, ensure the site is clear of obstructions and debris. Verify the door opening dimensions match the roller door system specifications. Check for proper structural integrity of the surrounding walls and framework to support the door’s weight. Ensure the floor is level and stable to prevent misalignment. Identify the appropriate entry points for power and control cables, using glands or conduit fittings as required. Properly route the cables to avoid damage or interference. Refer to the manual for specific motor types and wiring recommendations. Ensure all safety precautions are observed, and necessary tools are readily available. A well-prepared site ensures a smooth and safe installation process.
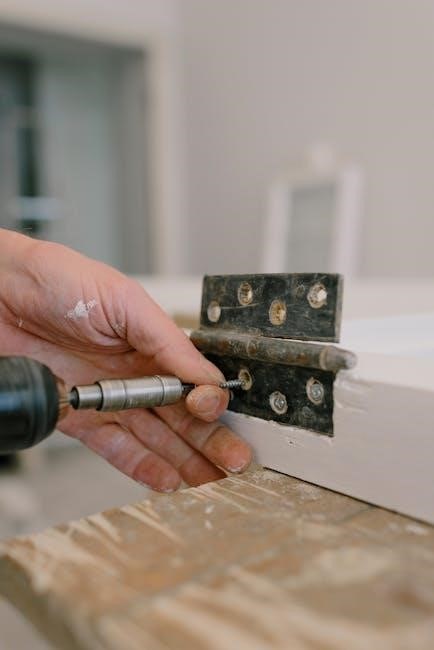
3.2 Mounting the Operator and Door Components
Mounting the operator and door components requires precision to ensure proper functionality. Secure the operator to the wall using the provided brackets, ensuring it is level and aligned with the door opening. Attach the door components, such as the curtain and rollers, to the operator according to the manufacturer’s specifications. Connect the drive chain or belt, ensuring it is properly tensioned to avoid slippage. Double-check the alignment of all moving parts to prevent wear and tear. If the door direction is incorrect, refer to the manual for adjustment instructions. Use the manual release mechanism if needed to test the door’s movement before finalizing the installation. Proper mounting ensures smooth and reliable operation.
3.3 Connecting Power and Wiring
Connect power and wiring carefully to ensure safe and proper operation. Open the enclosure and feed the power leads through the conduit entry. Attach the power leads to the correct positions on the terminal block, referencing the motor type specified in the manual. Use the provided 6-meter RJ45 cable to connect the controller to the operator. Ensure all connections are secure and properly insulated. If the door direction is incorrect, refer to the manual for adjustment instructions. Always test the system after wiring to confirm correct operation. Use the manual release mechanism if needed to test door movement before finalizing the installation. Proper wiring ensures reliable performance and safety.
Configuring the Controller and Settings
Open the enclosure and feed the power leads through the conduit entry. Attach the leads to the correct terminal block positions based on the motor type. Connect the controller using the 6-meter RJ45 cable. Secure all connections and ensure proper insulation. If the door direction is incorrect, adjust according to the manual. After wiring, test the system to confirm correct operation. Use the manual release mechanism if needed to test door movement before finalizing. Proper wiring ensures reliable performance and safety. Consult a licensed electrician if unsure about any step to avoid hazards and ensure compliance with safety standards.
4.1 Understanding the Controller Functions
The Grifco roller door controller is designed to manage all door operations efficiently. It features advanced functions such as automatic opening, closing, and stopping. The controller also includes a manual override option for emergencies. With an intuitive LCD display, users can easily navigate settings and monitor door status. The eDrive 2.0 technology ensures smooth operation, while Security 2.0 provides enhanced protection against unauthorized access. Adjustments like sensitivity settings and timer functions can be configured for personalized use. Understanding these functions ensures optimal performance and safety. Always refer to the manual for specific instructions on configuring these settings to avoid malfunctions. Proper setup is key to enjoying reliable and secure door operation.

4.2 Programming the Remote Control
Programming the remote control for your Grifco roller door ensures secure and convenient operation. To start, press and hold the “Learn” button on the controller until the LED flashes. Release it and immediately press the desired button on the remote control. The LED will flash twice, confirming successful programming. For additional remotes, repeat the process within 30 seconds of the first remote’s programming. To clear existing codes, press and hold the “Learn” button until the LED flashes rapidly, then release. This resets the system, allowing you to reprogram remotes. Always ensure the remote is kept safe to prevent unauthorized access. Follow these steps carefully for smooth operation.
Operating and Maintaining the Roller Door
Ensure smooth operation by following daily usage tips and performing regular maintenance. Inspect components, lubricate moving parts, and address issues promptly to prevent malfunctions and extend longevity.
5.1 Daily Operation and Usage Tips
For optimal performance, operate your Grifco roller door smoothly by ensuring proper alignment and balance. Always use the remote control or manual release mechanism when necessary. Regularly inspect the door’s movement and listen for unusual noises. Clean the tracks and rollers to prevent debris buildup. Lubricate moving parts as recommended to maintain efficiency. Avoid overloading the door beyond its designed capacity. Test the door’s auto-reverse feature monthly to ensure safety. If issues arise, refer to the troubleshooting section. Remember to program your remote control correctly for secure operation. For security, utilize the perpetual rolling code technology in Grifco systems. Always follow the manual’s guidelines for seamless functionality.
5.2 Regular Maintenance and Inspection
Regular maintenance ensures the longevity and smooth operation of your Grifco roller door. Inspect the door springs, rollers, and hinges monthly for wear and tear. Clean the tracks and rollers to remove dirt and debris, which can cause friction and damage. Lubricate all moving parts, such as hinges and rollers, with a high-quality silicone-based lubricant to maintain efficiency. Check the door alignment and balance to ensure proper operation. Test the auto-reverse feature monthly by placing an object in the door’s path. Replace any worn or damaged components promptly. Schedule professional servicing annually to address complex issues. Always refer to the manual for specific maintenance recommendations tailored to your Grifco model.

Troubleshooting Common Issues
Troubleshoot common issues like motor failure, sensor malfunctions, or remote control problems. Check power connections, ensure sensors are clear, and test remote batteries. Refer to the manual for detailed solutions and reset procedures to restore functionality.
6.1 Identifying and Resolving Operational Problems
Identify operational issues such as incorrect door direction, motor failure, or sensor malfunctions. Check power connections and ensure sensors are unobstructed. For remote control problems, reprogram or replace batteries. If the door reverses unexpectedly, inspect for obstructions or alignment issues. Refer to the manual for step-by-step solutions and diagnostic guides. Reset the system if necessary, following the reinitialization process outlined. Addressing issues promptly ensures smooth operation and extends the lifespan of your Grifco roller door system;
6.2 Resetting the System and Reinitializing Settings
To reset the Grifco roller door system, press and hold the program button for 10 seconds, then release and press again briefly. The opener light will flash, confirming the reset. After resetting, reinitialize settings by reprogramming the remote control. Press the desired button on the remote, and the opener will confirm successful reinitialization. This process ensures the system returns to factory defaults, resolving configuration issues. Always follow these steps carefully to maintain proper functionality and security of your roller door system.
Warranty and Technical Support Information
Grifco offers a comprehensive warranty covering parts and labor for a specified period. For technical assistance, contact Grifco support via their official website or phone number provided.
7.1 Understanding the Warranty Terms
The Grifco warranty ensures your roller door system is protected against manufacturing defects. Coverage typically includes parts and labor for a specified period from the installation date. Proper installation, maintenance, and adherence to operational guidelines are essential to uphold warranty validity. Damage from misuse, neglect, or unauthorized modifications may void the warranty. For detailed terms, refer to the warranty section in this manual or contact Grifco support. Understanding these terms ensures you can address any issues promptly and maintain your system’s performance effectively over time. Always keep your proof of purchase handy for warranty claims.
7.2 Contacting Grifco Support for Assistance

For any inquiries, technical support, or assistance with your Grifco roller door, contact our dedicated support team. Visit the official Grifco website to access contact details, including phone numbers and email addresses. You can also download comprehensive manuals and guides directly from the site. Grifco support is available to address installation, maintenance, and operational issues, ensuring your system functions optimally. Whether you need troubleshooting advice or warranty-related help, our team is here to provide prompt and professional assistance. Reach out to us today for all your Grifco roller door needs and enjoy reliable support tailored to your requirements.